

3d Max Floor Plan Design

In the world of architecture and interior design, 3D floorplan renderings play a major role for better communication between the architect or designer and his clients. Not everybody can "read" an architectural 2D floor plan with all its technical elements therefore it is important to convert this plan into more understandable layout. An easy way is to use only the most relevant elements of the 2D drawing and add some colors to make it more understandable. But during the last years the 3D rendering of the architecture floor plan becomes more and more popular as it presents the design in a way everybody can understand directly.
So today in this tutorial I am going to show you the process of converting 2D floor plan into a realistic 3D floor view.
3D Floor Plan Rendering – What to keep in mind?
First of all I want to point out that it is not always the right choice to go for a 3D floor rendering. Why? … because it depends on the project status from my point of view. Generally you start every project on a rough level of detail and be detailed down the road. Your communication strategy with drawings, images and renderings with the client should follow this typical route. Start with presentation material that do not show every detail (material, furniture etc.) but rather leaves space for ideas and interpretations of the client.
In a later stage when you have fixed the general design of the floor plan you can use a 3D rendering to discuss materials but also fix some minor changes in the floor plan layout as the client now gets a better feeling about proportion etc…
So I like to use the 3D floor plan rather in a later stage of the design when I already have a clue about the materials and interior the client likes – otherwise you risk to "destroy" your overall layout idea with the wrong kind of materials.
With that being said let´s check the specific requirement for the project I want to use for this tutorial.
Materials and interior wishes of the client
Every project is different so it is important to keep the overall objective and requirements in mind to make the most out of it. Therefore the first step to start this project is to know the project requirements.
For this project, the client had some specific wishes in terms of materials:
- Wooden floorings
- Carpet flooring for master bedroom
- Double hung windows in the living room and master bedroom
- White painted wooden doors and windows
- Objects in the scene which makes the render more lively
Software used to create 3D rendered floor plan
For this kind of projects I like to use following tools:
- Modeling, lighting & rendering software: Autodesk 3Ds Max and Vray
- Post Production Software: Adobe Photoshop
- Models- Furniture and meshes from evermotion
To give you a good overview about the steps I make from start to finish, I have divided this tutorial into following parts:
- Importing 2D floor plan into 3Ds Max.
- Modeling
- Texturing
- Vray lighting
- Vray render settings
Importing 2D floor plan into 3DS MAX
Importing and AutoCAD plan is a very crucial step in this tutorial which should be taken care of.
An AutoCAD plan can be imported in 3DS Max in different file units like Inches, feet, millimeter, centimeter etc. Selecting a unit depends upon the unit settings of your AutoCAD drawing.
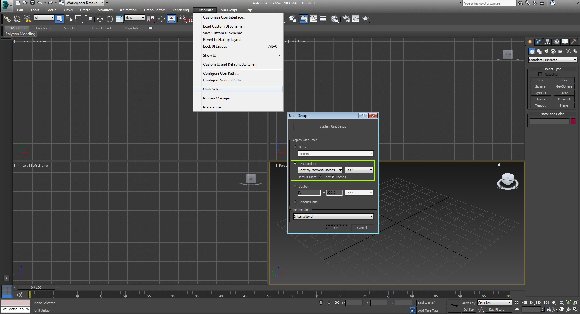
Set up the units: The AutoCAD plan I am importing is measured in meters. It is best to use the same setting in 3ds max.
- Start 3Ds Max
- Choose unit setup from customize menu
- In the unit setup dialog choose US standard> Feet w/fractional inches and leave the other value set to their defaults.
Import the DWG file:
- From the application menu, choose import
- Browse to the folder of your choice and select the DWG file and click Open
- Click the setting to default and click OK
- Group the plan from Group tab and set the x, y and Z coordinates to Zero
- Right click > choose freeze selection
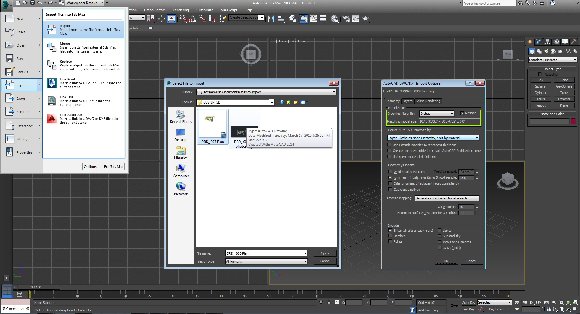
In import option Dialog box, I chose Inches because the AutoCAD drawing based on Feet and Inches. So if your drawing is made in meters, then first change the unit setup into metric and then select meters in the import options.
Modelling the 3D ground floor plan rendering
Let`s start with the walls. For modeling the walls I here used the spline modeling method. Before you start you should think about the potential camera position and angle you use. In my case I wanted to highlight the entrance area, so I kept the wall heights low at the front as 4 feet. And the higher walls on the back as 8 feet (actual height of the wall).
Extruding the walls:
- Go to top view (shortcut-T)
- Switch on 2.5 snap toggle icon. (Shortcut-S).
- Right click on the snap toggle and select only vertex from the grid and snap setting dialog box.

- Draw the walls with the line tool from top view and give extrude modifier with 4 feet or 8 feet in the amount respectively.

The Snap Toggle tool is very powerful for modeling architectural drawings as the vertex mode helps to draw the line which can stick on to the plan and get accurate measurements.
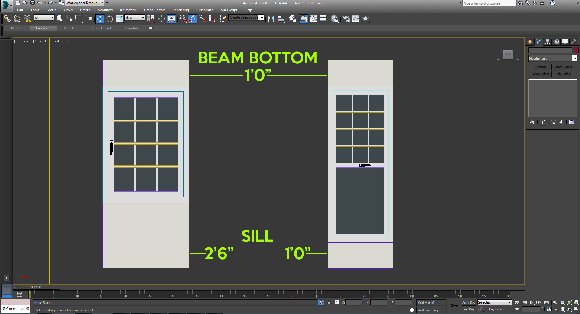
To make the sills and beam bottoms for the windows, use the same method. Keep 7 feet as lentil level and 1 foot for beam bottom as shown in the picture below.
I took 1 foot as sills for the double hung windows in living area, master bedroom, 2 feet 6 inches for the bedroom windows, kitchen and utility.
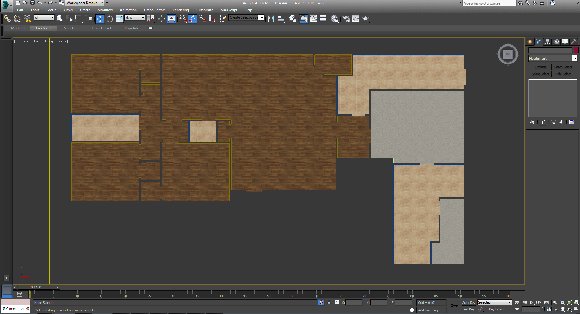
Floors:
For flooring, divide the area into four categories:
- Wooden flooring for living and bedroom
- Carpet flooring for master bedroom and master toilet closet
- 5×1.5 feet tiles for toilets and utility
- Concrete flooring for front patio and parking area
While making the floors, use the same technique and give 20 mm amount for extrude.
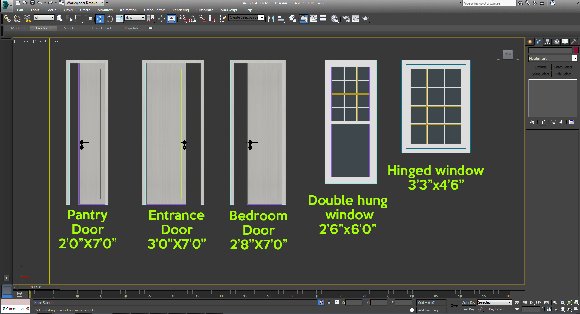
Windows and doors:
As per the client's requirement, I have modeled double hung French windows and normal windows as per the sill and lentil levels modeled before.
The double hung windows are 2 feet 6 inches by 6 feet with 50 mm of outer border. The other windows are 3 feet 3 inches by 4 feet 6 inches in height.
There are different doors which have been used in this plan:
- Bedroom doors- 7 feet by 2 feet 8 inches wide with 50 mm of border
- Entrance door- 7 feet by 3 feet wide with 5o mm of border
- Toilet doors- 7 feet by 2 feet 6 inches wide with 50 mm of border
- Pantry door- 7 feet by 2feet wide with 50 mm of border
I have used normal hinged doors for this project.
Counter tops:
There are ready made counter tops available out there, but I preferred to model it by myself as it gives me the flexibility to design exactly according to the plan.
For kitchen and breakfast counter tops, draw line and extrude 25 mm (1 inch approx.) thick granite and place it 800mm (2 feet 6 inches) up from the finished floor level.
Follow the same for all the toilet basin counters. Now you can place the meshes of kitchen sink, toilet sink beneath the counter and can cover it up by cabinet below.
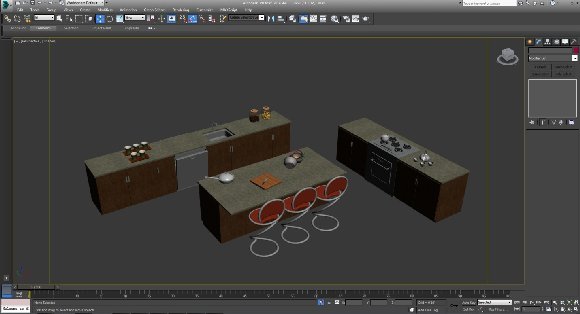
Place all the furniture like bed, dining table, living couch TV tops with TVs and try to place all those objects which you can see around in your house which and will make your scene more lively. In the scene observe the varieties of objects which have been used.
Additional you can give wall tiles for kitchen and toilets for getting more features. I have given 5 mm wall tile for the toilets and kitchen.
Texturing the extruded 2D floor plan elements
Texturing is quite important to control the overall look of your scenery and thus plays a major role to create a good architectural visualization.
Always try to use colors or material which is complimentary and soothing to eye when rendered. Don't use something which is too contrast or too dull.
In this project I have used Vray material. Click on the Material Editor tab from the toolbar (Shortcut –M)> Click on the material slot > select Standard and pick Vray Mtl from the Material/Map Browser.
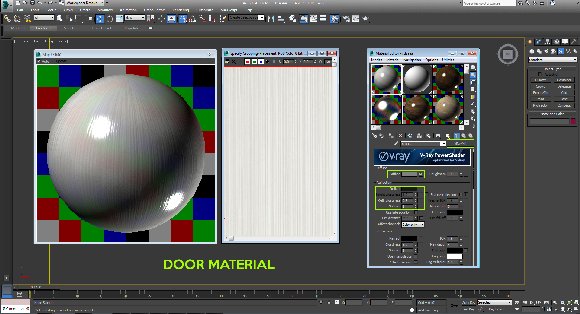
The standard material will convert into a Vray material. Click on the small box near diffuse and select bitmap. In the dialog box, select the map you want to put for the object.
It is very important to study the properties of the material
For example, to make a material for the doors I have selected a white paint material as a bitmap. Now to get the properties of a painted door I have given a reflection of value 25 and glossiness of 0.8. I have used the same map in the bump with a value of 20.
From the modifier list, give an UVW Map to get the right scale of the material.
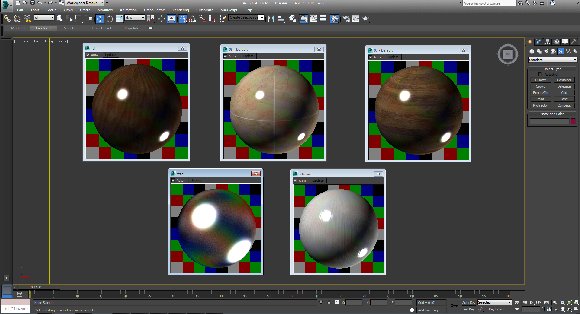
Below are some of the examples of material and their properties which I have used in this project.
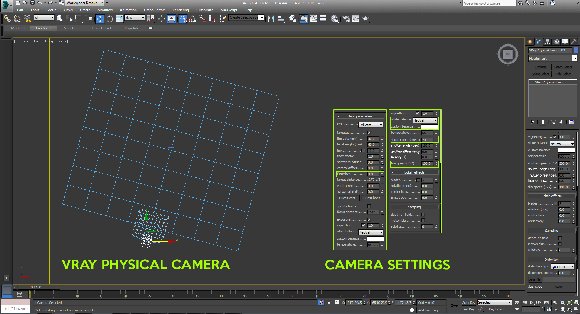
How to set up the Vray Physical Camera in 3ds MAX
I use the Vray Physical Camera and choose a proper position and viewing angle.
Below I will describe the settings of my Vray Physical Camera which I have used for this project:
The changes in the value of focal length, white balance, f number, shutter speed and ISO can affect your lighting and render to a higher level. So let's go to the ini detail for these where you can understand what they are and why they affect the final output.
- Focal length: Focal length is set in millimeters and it just work like changing a lens on SLR camera. The lower the value you give, the wide the angle you get and the higher the value you give, the smaller the angle you get.
- F Number: The lenses aperture is usually specified as f number. Less value gives more light and increasing depth of field effect, while higher value decreases the light with less depth of field.
- White balance: Using white balance color allows additional modifications to the output
Set up Vray lightning for 3D architecture rendering
Vray lighting brings out the value for your hard work you have done in texturing. In this project I have used only two lights:
- Vray dome light
- Vray sun
Vray dome light helps to create the overall illumination of the architecture scene. It helps to fill all those dark places where light cannot reach. It works as a skylight and gives your rendering a brighter and softer looks.
To create a Vray dome light, go to lights > Vray > Vray light from object type > select dome from the type and click on the viewport.
I have used the following setting for my Vray dome light in the image below:

Vray Sun:
Although Vray dome light make the scene brighter, but it doesn't create any shadow. And a rendering without a shadow looks somehow dead. You should always create interesting shadows to get a good visualization as it simply helps to understand the 3D geometry – and that is what it is all about…
Vray sun helps you to create interesting shadows. You can play around with the Vray sun with different angles and height to get the best output. I have used following setting for Vray sun in the image below:

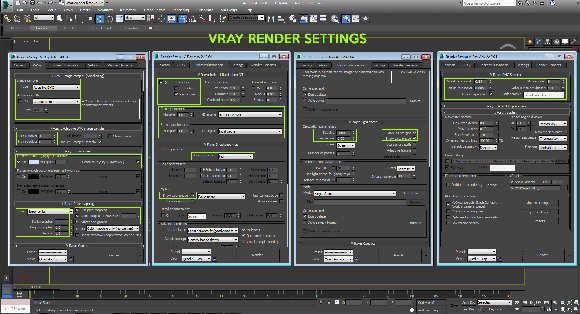
Vray Render settings in 3DS MAX
In Vray the most magical part is to define the "right" setting. You can change the overall look of the scene with the help of these settings. There are some preset settings which you can apply to get a good rendering result.
But to get something out of the box, you have to play around with it. Here are some of the render settings which I have used for this project to get a good output. Of course you can try to experiment with other settings to tweak it even more or create a specific look for your project.
With these settings I already get a proper result even without any additional Photoshop post production work. My rendering at this stage looks like this:

You can definitely now import it to Adobe Photoshop and play around with brightness contrast, levels and tones. But at this stage I am pretty happy with this result as it meets my overall expectations.
I hope you enjoyed the tutorial and got an idea how I create a 3D floor plan rendering of my architectural designs by using 3DS MAX and Vray!
3d Max Floor Plan Design
Source: https://www.tonytextures.com/how-to-create-a-3d-architecture-floor-plan-rendering/
Posted by: huberdoperelpland.blogspot.com
0 Response to "3d Max Floor Plan Design"
Post a Comment