

How To Add Sidebar In Wordpress Blog Page
Search bar is an essential element of a website which no one would disagree with. This is because a website contains loads of information through homepage, product pages, blog pages, pricing page, etc. Now, if you need some pieces of information existing on these pages, how are you going to find them?
Are you going to find them visiting those pages individually? Surely, you wouldn't like to do so. Not that you won't find your required information in this way. But it's time-consuming and sickening as well. This is where adding a search bar to your site will come into play.
Why Add a Search Bar in your Site?
Suppose, you don't have a search bar on your site. In that case, when the visitors will visit your site, they will struggle to find their required information. As a result, they will leave your site and your whole purpose of getting them into the website will go in vain.
Let me present some of the major benefits you can notch up adding a search bar in your site below-
- Eases your customers' effort to find information
- Streamlines user experience
- Boosts Engagement
- Reduces bounce rate
- Displays the necessary items or information with a few keywords reducing effort
Adding a Search Bar on the Menu with WordPress Default Search Widget:
Can you add a search bar on the menu with WordPress default search widget? No, you can't. Because WordPress lets you add search bar only in widget-ready areas.
If you wanna add a search bar on the menu, you have to leverage other plugins or widgets in different areas of your website including header and footer.
That's why I would walk you through 3 different methods of adding a search bar on your WordPress site in this tutorial.
Now, let's take a look at the way you can add a search bar to your website through WordPress default widget.
Add a Search Bar with WordPress Default Search Widget:
The easiest and the most convenient way of injecting a search bar to your website is through your WordPress dashboard. How to do that? Let's check it out-
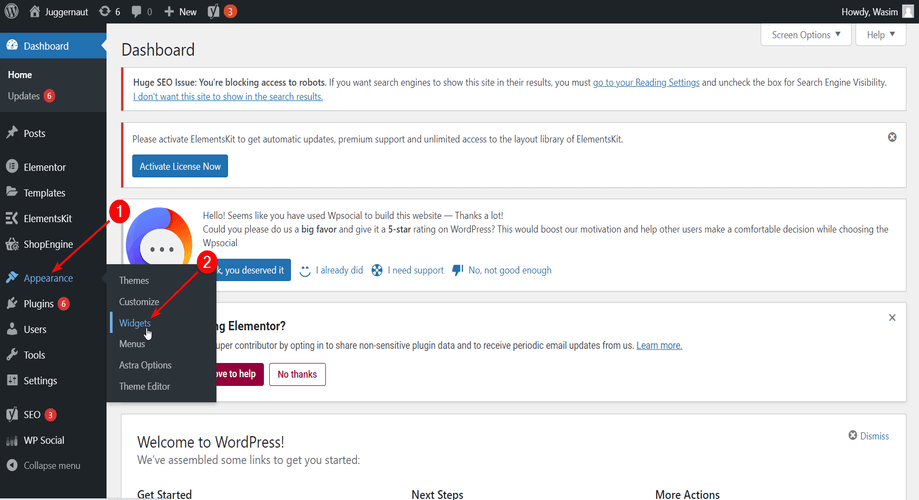
At the outset, go to the dashboard of your admin panel and find Appearance. Navigate and click Widgets from a list of items under Appearance.
Dashboard > Appearance > Widgets
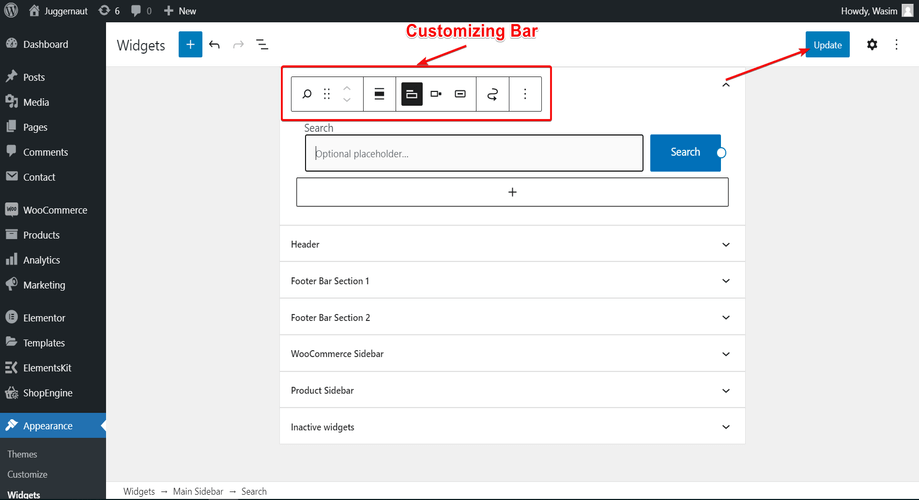
Add the Search Widget from the Available Widgets:
This will take you to a new page appearing with different page sections. Now, hit the "Add block" button (Appears with + sign) to view all the existing widgets.
Scroll down to find the search widget or you can write "Search" on the search field to find the search widget.
Click the section you want the search bar to show up and then hit the search widget. Alternatively, you can also drag and drop the search widget to your desired section.

Make the Necessary Tweaks:
The search bar will show up now under the selected section. You can make the required changes to different elements like the search bar alignment, button position, text color, and so on.
You can also add a custom label to the search bar as per your requirements. Finally, click the Update button.
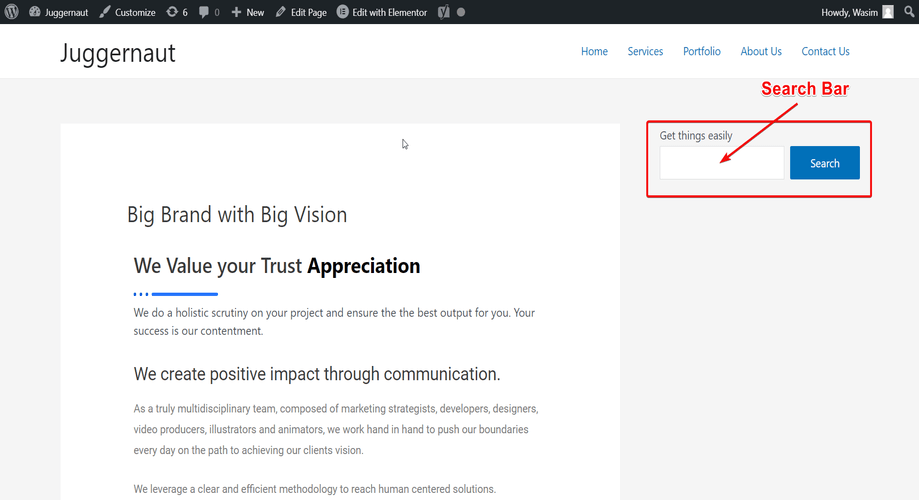
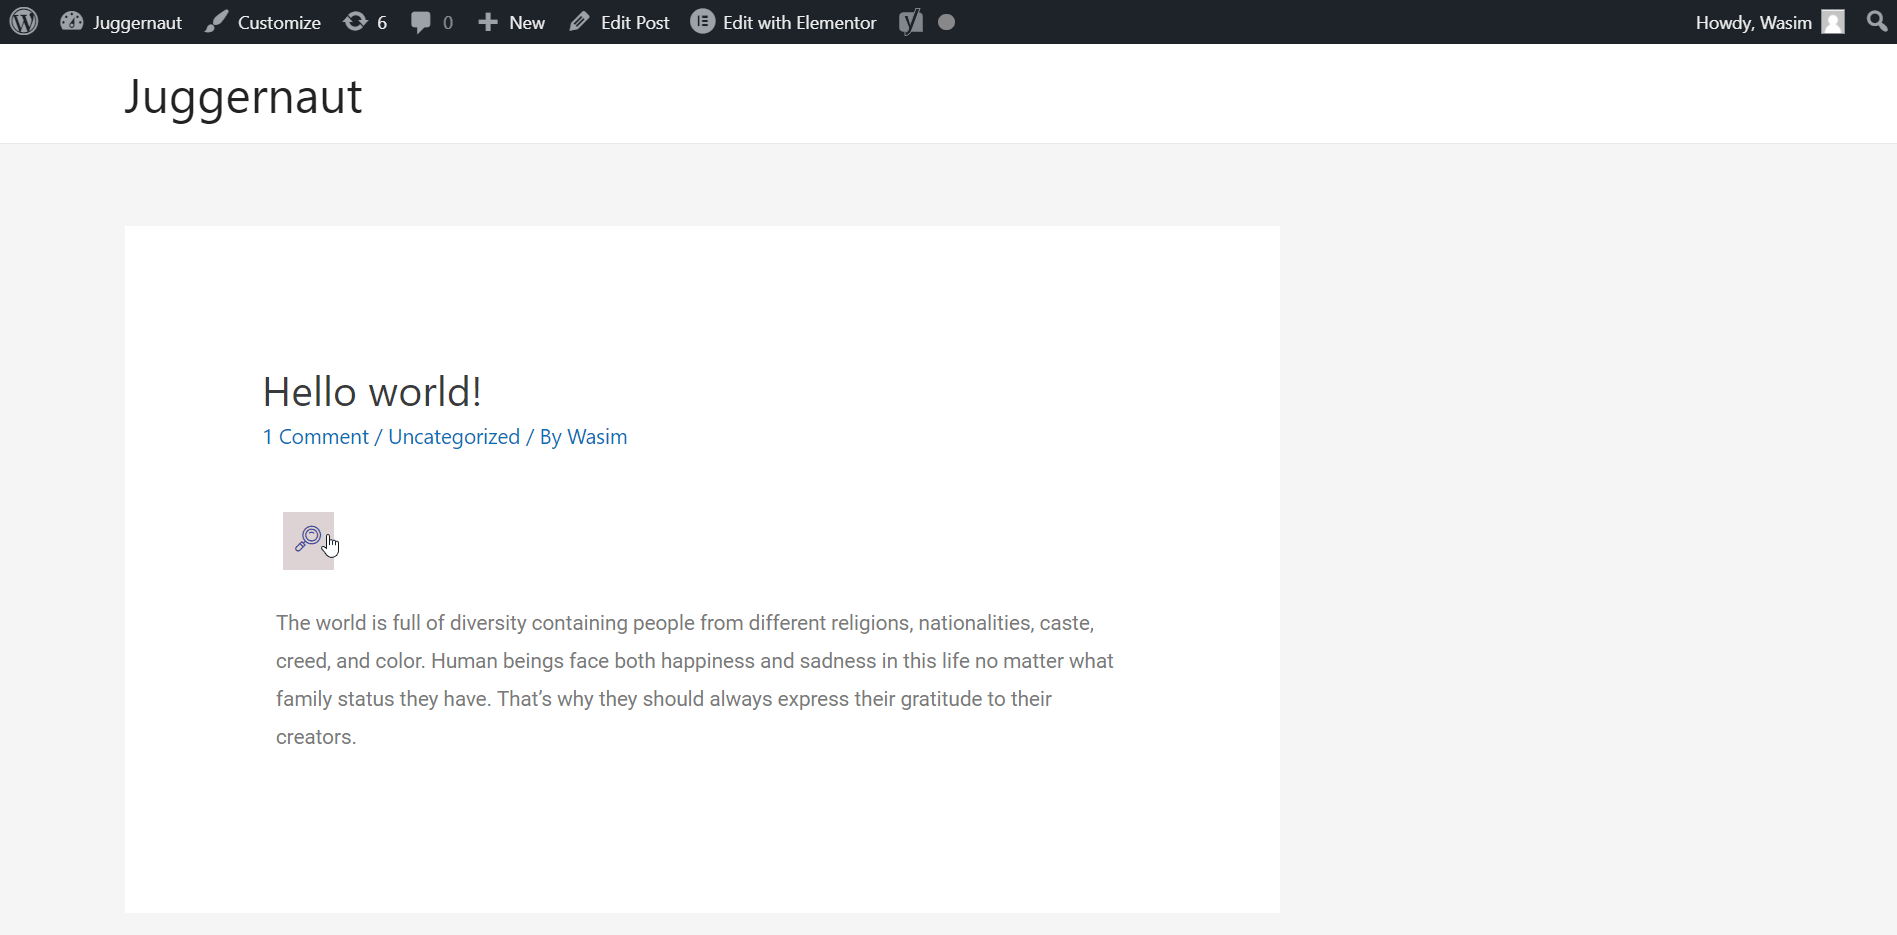
View the Search Bar in your Page:
Now, if you visit any of your published pages or posts, you can notice the search bar or search box showing up on the main sidebar.
Add a Search Bar with ElementsKit Search Widget:
Now, I will walk you through another easy-peasy way to add a search bar in your WordPress site. And that's through ElementsKit's Header Search widget. It's super simple to add a search box through ElementsKit.
Without further ado, let's check it out-
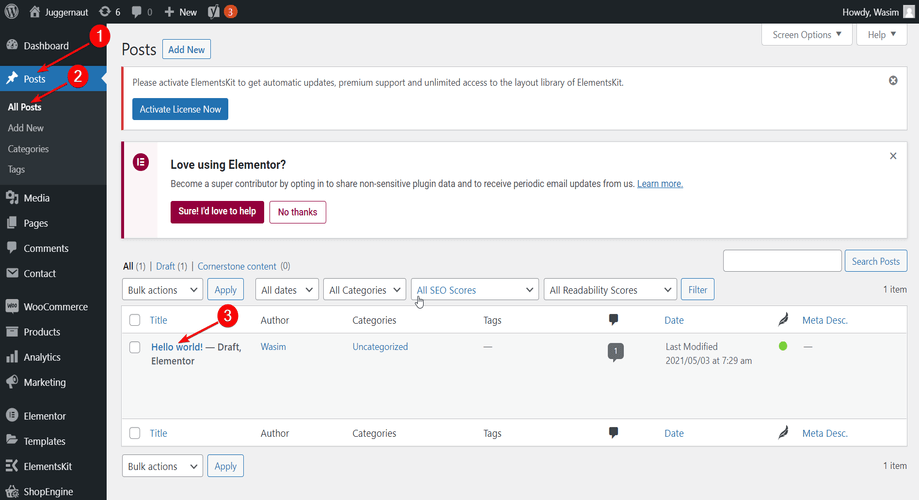
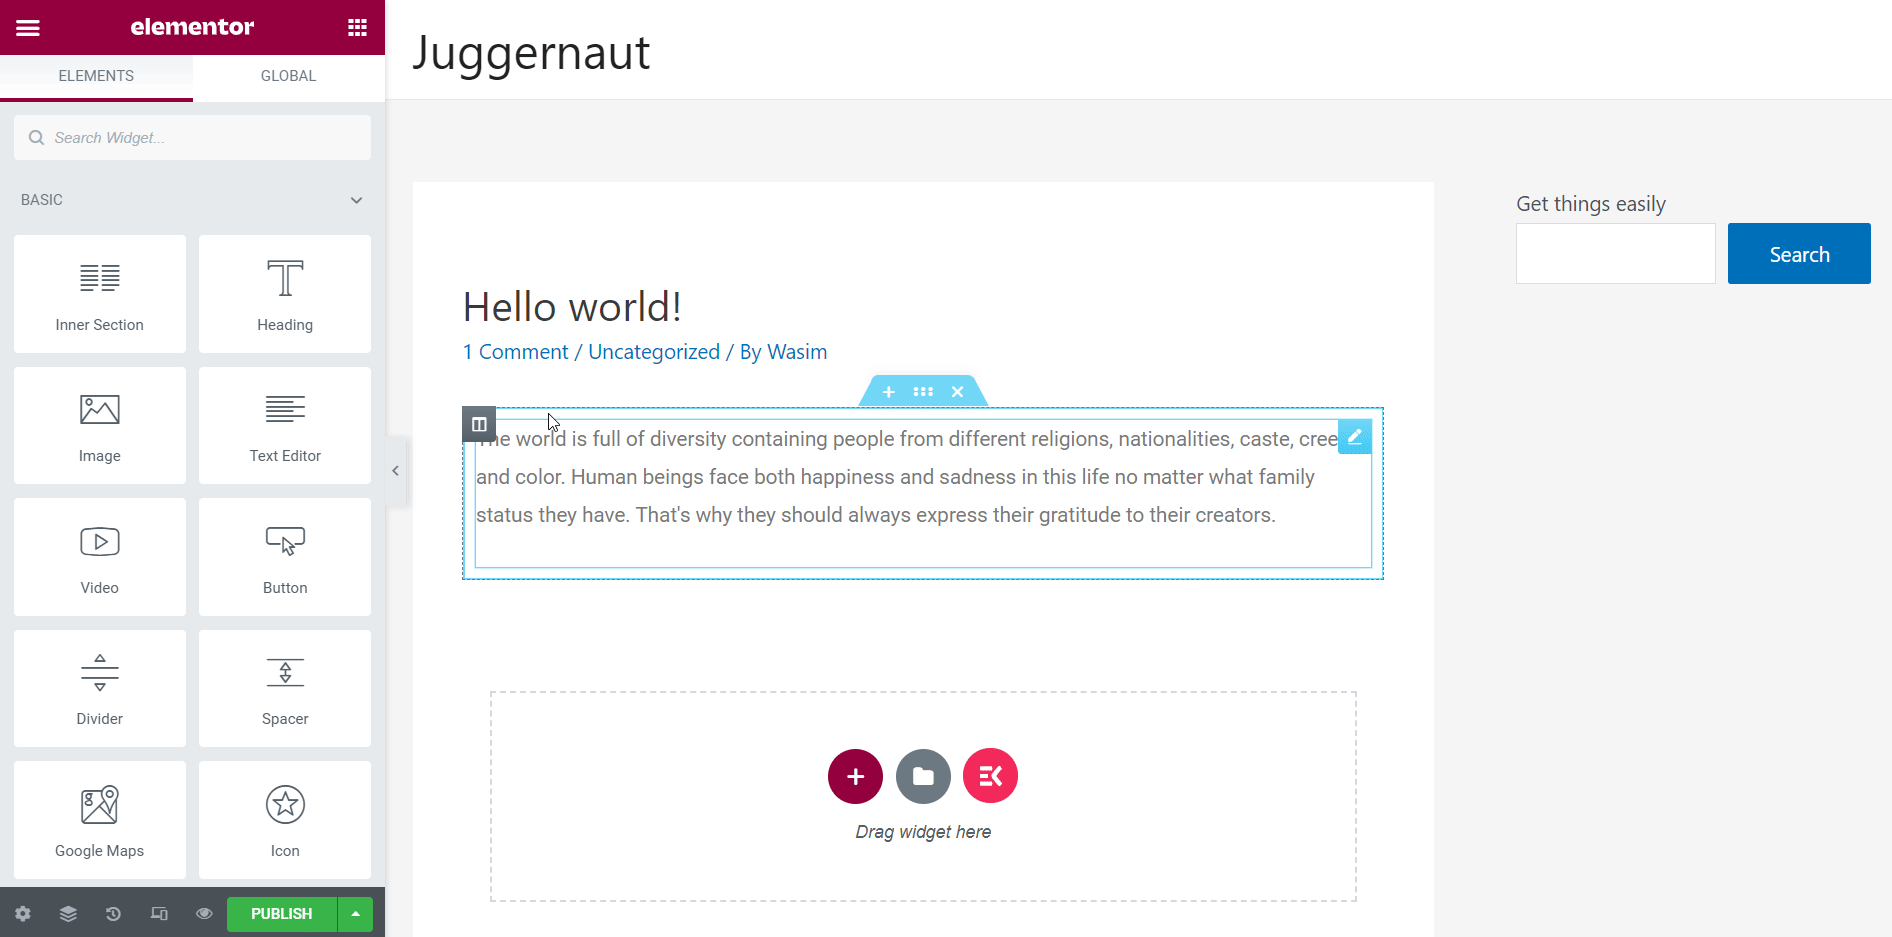
First of all, go to the dashboard and find posts or pages. Here, I will show how the ElementsKit widget works with a post named "Hello World!"
Go to "Posts" and then select "All Posts" to let all your posts show up. From there, you can choose the post where you want to add a search bar. In case you don't have any existing post or page, you have to add a new post or page.
Dashboard > Posts > All Posts > Your Post
Switch to the Elementor Window:
Now, click "Edit with Elementor" located on the top-middle. This will take you to the Elementor window.

Drag and drop the Header Search Widget:
In the Elementor window, you will get access to tons of widgets. Type the "Header Search" widget on the search field to find the widget. Alternatively, you can scroll down and find the widget as well.
Once you track down the widget, drag and drop it to the designated area to let the search bar show up. Don't forget to add the section above the text of your post as it's a header search bar.
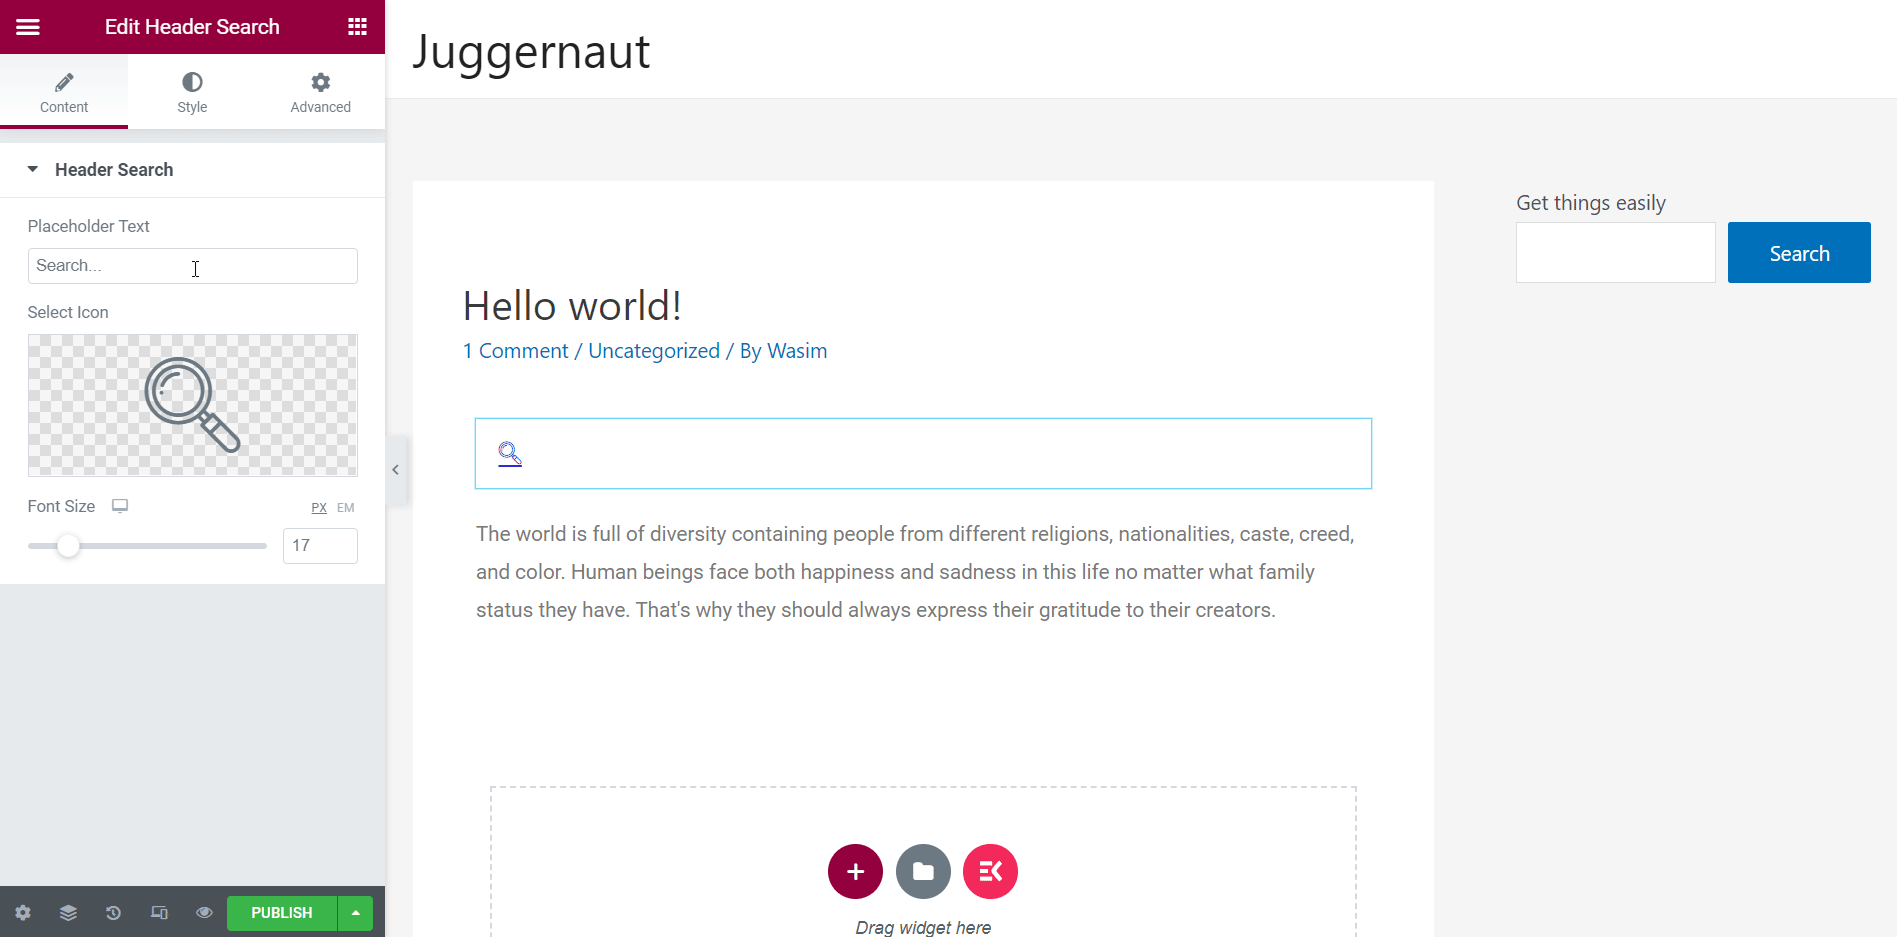
Set the Parameters of the Search Bar:
Once the search bar appears on the page, it's time to set the parameters of the bar as per your preference. Under the Content tab, you will have a Header Search section where you put a placeholder text, select a search icon, and adjust the font size.
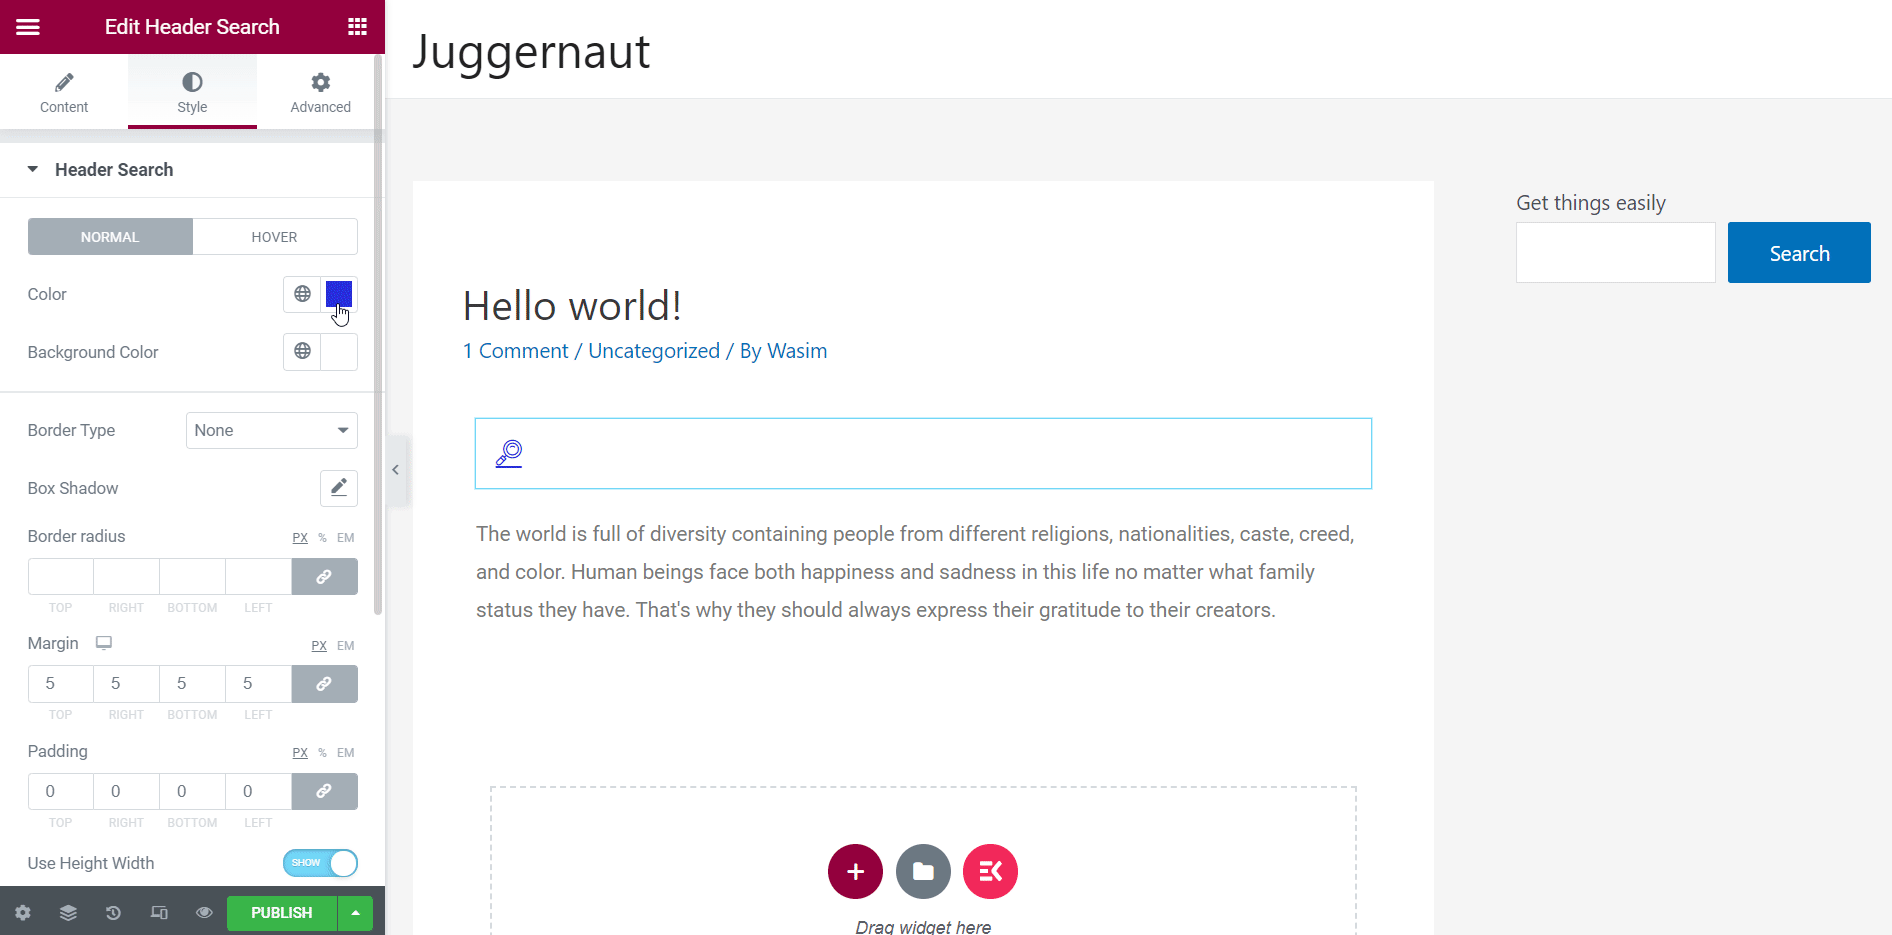
Under the Style tab, you will have 2 sections- Header Search and Search Container. From the Header Search section, you can adjust the parameters like background color, border type, search box shadow, margin, etc. of the search bar.
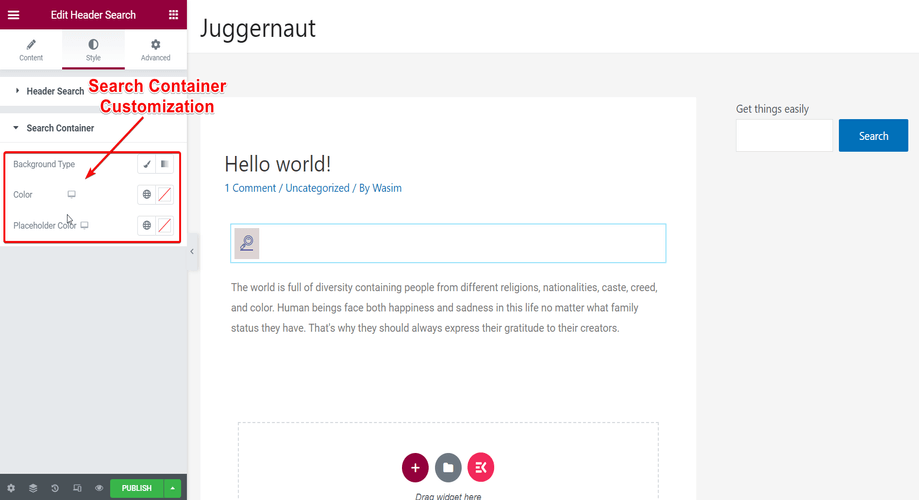
From the Search Container section, you can select the background type and set the placeholder text and border color.
Finally, You are Good to Go!
After you have finalized your settings, you are all-set to check and view the search bar on the front-end of your post. If you aren't happy with the search box look, you are free to modify it from the admin panel again.
ElementsKit is an all-in-one addon for Elementor page builder including powerful modules, widgets, megamenu, and header & footer.
Add A Search Box with CSS Code:
There is one more way you can use to add a search bar in your site and that's using CSS code. Although, you need a bit of technical knowledge to do that, it's not rocket science. I will show you the process here and it will be super easy after that.
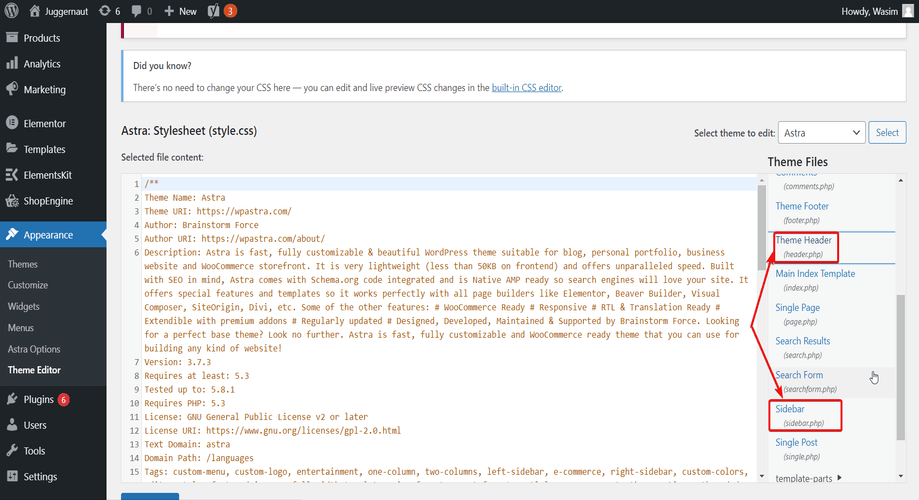
Go to the Theme Editor:
First of all, click "Appearance" from the dashboard and navigate to the "Theme Editor".

With that, you will move to the style.css file by default. From there, open the header.php or sidebar.php file depending on the position where you want the search bar to show up.
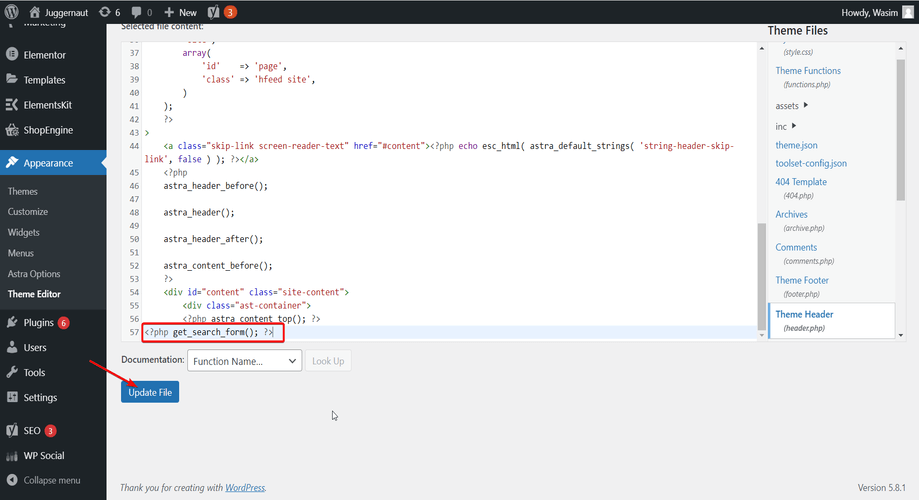
Add a Search Bar Function:
Now, add this function <?php get_search_form(); ?> in your header.php or sidebar.php file code. I have added the function in the header.php file code.
View the Search Bar on your Site:
Finally, open any of your published pages and you'll notice the search bar appearing on the top. If you added the function in the sidebar.php file, search bar would appear on the sidebar.

Winding up:
This is it!!! I have walked you through 3 super easy techniques of adding a search bar to your WordPress site. Depending on your requirements, you can opt for any of them. However, if you add a search box with ElementsKit's header search widget, you will get an extra benefit.
What's that? Bottomless customization options!!! Hence, if you love customization, make use of ElementsKit's header search widget. With that, you can give your search bar a mesmerizing appearance.

How To Add Sidebar In Wordpress Blog Page
Source: https://wpmet.com/add-search-bar-in-wordpress-site/
Posted by: huberdoperelpland.blogspot.com
0 Response to "How To Add Sidebar In Wordpress Blog Page"
Post a Comment